
Hi Friends!
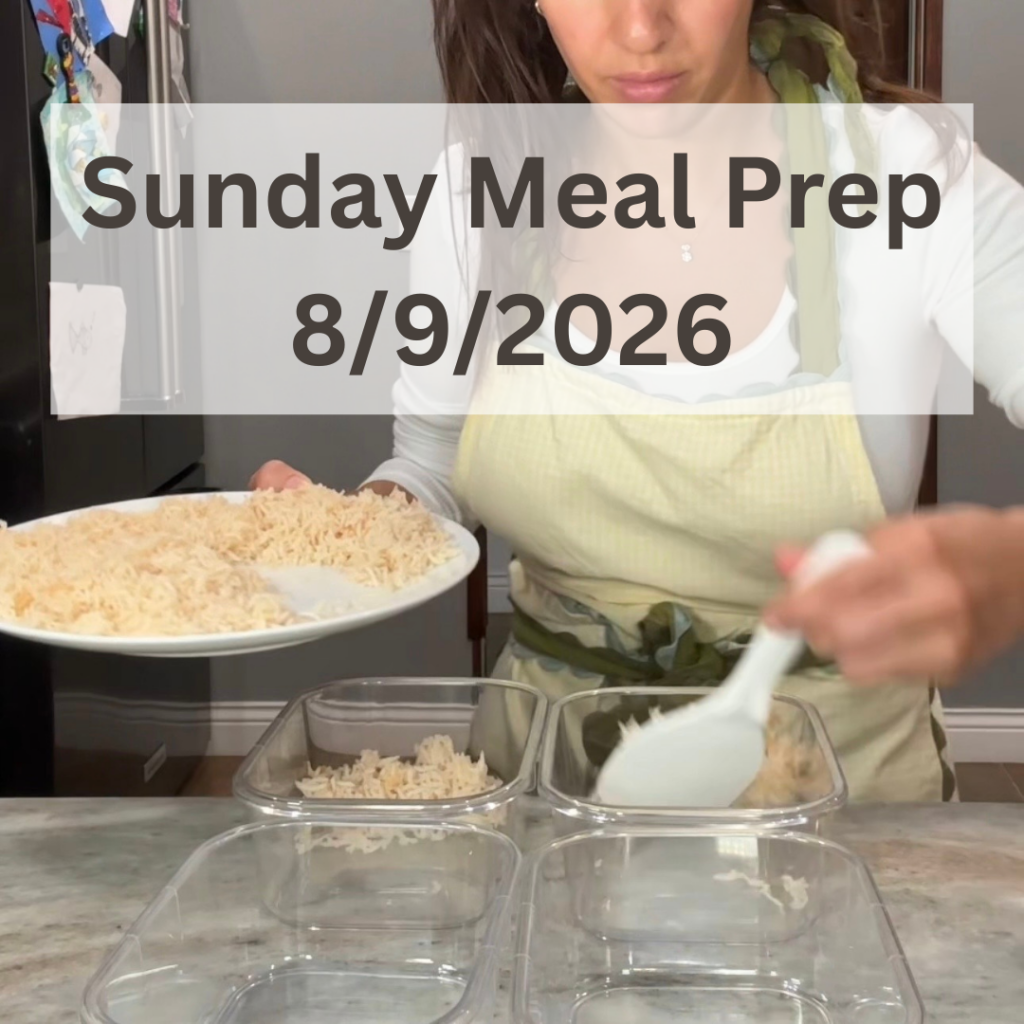
This week’s Sunday meal prep is all about making busy weekdays feel a little easier. I’m preparing a few simple recipes that give us breakfast, work lunches, and easy family meals without having to cook everything from scratch during the week.
I’m starting with chia pudding topped with peach and blueberry jammy fruit for an easy make-ahead breakfast. For lunch, I’m making a high-protein chicken Caesar pasta salad that I can pack for my husband to take to work and keep ready for my own busy work-from-home days.
I’m also preparing a Southwest black bean quinoa salad for an easy plant-based lunch or side dish, along with sheet pan Lebanese kafta meatballs with roasted tomatoes and onions for a simple family dinner served with white rice.
Along with these recipes, I’m sharing a few smaller food-prep tasks, like washing and cutting fruit and preparing vegetables ahead of time. These simple steps may not feel like traditional meal prep, but they make it much easier to put together breakfasts, lunches, snacks, and dinners when the week gets busy.
The goal is not to prepare every single meal in advance or eat the exact same thing every day. I like to make a few versatile recipes and ingredients that give us a helpful head start while still leaving room to decide what sounds good each day.
Click the play button below to watch this week’s full Sunday Meal Prep video and see exactly how I made everything.
- Hi Friends!
- This Week’s Sunday Meal Prep Menu
- How I’m Using These This Week
- Kitchen Tools, Equipment & Containers Used
- Chia Pudding with Seasonal Jammy Fruit
- Peach and Blueberry Chia Pudding
- High-Protein Chicken Caesar Pasta Salad
- Southwest Black Bean Quinoa Salad
- Southwest Black Bean Quinoa Salad
- Sheet Pan Lebanese Kafta Meatballs with Tomatoes and Onions
- Sheet Pan Lebanese Kafta Meatballs with Tomatoes and Onions
- Wash and Prep Fruits and Vegetables for the Week
- Final Thoughts
- More Sunday Meal Prep Ideas
This Week’s Sunday Meal Prep Menu
Here’s everything I’m prepping this week:
- Chia Pudding with Seasonal Jammy Fruit
- High-Protein Chicken Caesar Pasta Salad
- Southwest Black Bean Quinoa Salad
- Sheet Pan Kafta Meatballs
- Washed and Cut Fruit and Vegetables
This week’s meal prep gives me a make-ahead breakfast, easy work lunches, and a few versatile ingredients that can be mixed and matched for family meals throughout the week.
The chia pudding is an easy breakfast I can grab straight from the refrigerator, while the chicken Caesar pasta salad gives my husband a lunch to take to work and gives me something ready for busy days at home.
The Southwest black bean quinoa salad is a complete meal-prep option that can be enjoyed on its own for lunch or served as a colorful side dish. The sheet pan kafta meatballs are a separate meal that I’ll serve with white rice, roasted tomatoes and onions, and a creamy yogurt-tahini sauce. I’m also washing and cutting a few fruits and vegetables ahead of time so they are ready for snacks, lunch boxes, and easy sides throughout the week.
I’ve listed the exact containers and kitchen tools I used this week below. You can also browse more of my favorite meal-prep storage essentials in my Best Meal Prep Containers guide.
How I’m Using These This Week
One of my favorite things about meal prepping is that it does not have to mean eating the exact same meals every day. I like to prepare a few recipes and ingredients that can be used in different ways depending on our schedule and what everyone feels like eating.
The chia pudding with seasonal jammy fruit is my make-ahead breakfast for the week. I can prepare the jars ahead of time and keep them in the refrigerator for an easy breakfast on busy mornings. The jammy fruit adds natural sweetness and makes it easy to change the flavor depending on what fruit is in season.
The high-protein chicken Caesar pasta salad is one of the lunches I like to prepare for my husband to take to work. Since he works a traditional nine-to-five and packs his lunch most days, having several portions ready makes mornings much easier. I also keep a serving at home for myself so I have lunch ready during busy work-from-home days.
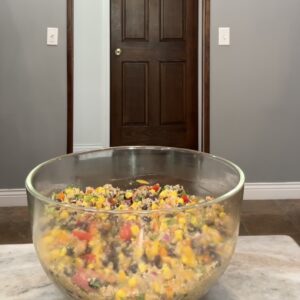
The Southwest black bean quinoa salad is a complete make-ahead dish that I can enjoy on its own for lunch or serve as a colorful side throughout the week. It is packed with black beans, corn, fresh vegetables, and a lime dressing, so it already has plenty of flavor and texture without needing to be turned into another bowl or salad.
The sheet pan kafta meatballs are an easy lunch or dinner option that I’m serving with white rice. I added sliced onions and tomatoes directly to the sheet pan so they roast alongside the kafta and release their juices as they cook, which keeps the meal flavorful and helps prevent the rice and meatballs from feeling dry. Cooking everything together on one pan also keeps preparation and cleanup simple.le.
I’m also washing and cutting some fruit and vegetables ahead of time. This is one of the easiest meal-prep habits because it makes produce more convenient to add to meals, pack with lunches, or serve as a quick snack throughout the week.
Together, these recipes give us a flexible breakfast, prepared lunches, an easy protein, and a few ready-to-use ingredients that make weekday meals come together faster.
Kitchen Tools, Equipment & Containers Used
Here are the kitchen tools, containers, and equipment I used for this week’s Sunday meal prep. These are the items that helped me prepare, portion, and store everything more efficiently.
- Green Olive Handle Chef Knife
- Stainless Steel Skillet
- Glass Meal Prep Jars (for the chia parfaits)
- Salad Meal Prep Jars
- Kafta Meal Prep Containers
- Chef knife (olive wood handle)
- Cutting board
- Veggie chopper
- Box Grater
- Measuring glass cup
- Stainless Steel Measuring Spoons
- Carbon Steel Griddle
- Silver and Gold Pot (for pasta)
- Nonstick grill pan
- Salad Spinner
- Vacuum Sealer Glass Container
- Vacuum Sealer
You can find the containers and kitchen tools I use most often in my Best Meal Prep Containers guide.
Chia Pudding with Seasonal Jammy Fruit
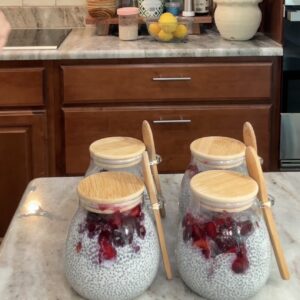
This chia pudding with seasonal jammy fruit is an easy make-ahead breakfast that is perfect for busy mornings. The chia pudding is creamy, lightly sweetened, and packed with fiber, while the warm jammy fruit adds fresh seasonal flavor without requiring a separate store-bought jam.
I love preparing chia pudding as part of my Sunday meal prep because it only takes a few minutes to mix together and stores well in individual jars. Once breakfast is portioned and waiting in the refrigerator, I can simply grab a jar in the morning and add any toppings I’m craving.
The jammy fruit can be made with whatever seasonal fruit you have available. Berries, peaches, cherries, plums, or a combination of fruits all work well. Gently cooking the fruit helps release its natural juices and creates a thick, spoonable topping that tastes delicious layered over the chilled chia pudding.
For additional protein, you can make the chia pudding with Greek yogurt and milk or serve it with an extra spoonful of Greek yogurt on top. Add nuts, seeds, or granola just before serving for extra texture and crunch.
Grocery List
- Chia seeds
- Milk of choice
- Plain Greek yogurt
- Maple syrup or honey
- Vanilla extract
- Pinch of salt
- Seasonal fruit
- Fresh lemon juice
- Cinnamon, optional
- Granola, chopped nuts, or seeds for topping, optional
Serves: 4
Why I Love It
- Easy make-ahead breakfast for busy mornings
- Naturally high in fiber from chia seeds and fruit
- Greek yogurt adds creaminess and protein
- Easy to customize with whatever fruit is in season
- Stores well in individual jars for grab-and-go breakfasts
- Can be topped differently each day for more variety
- Requires only a few minutes of active preparation
The seasonal jammy fruit makes this breakfast feel a little more special while still keeping the recipe simple. It is also a great way to use fruit that is becoming soft or needs to be eaten soon.
Customization & Tips
- Use ripe peaches for the best natural sweetness and flavor. If the peaches are very firm, they may need a few extra minutes to soften while cooking.
- Fresh or frozen blueberries both work well. If using frozen blueberries, there is no need to thaw them first.
- Cut the peaches into small, evenly sized pieces so they cook down at the same rate as the blueberries.
- Cook the peaches and blueberries over medium-low heat until the fruit softens and releases its juices. Gently mash some of the blueberries while leaving a few pieces of peach intact for texture.
- Add a squeeze of fresh lemon juice to brighten the flavor and balance the sweetness of the fruit.
- If the fruit is naturally sweet, you may not need much maple syrup or honey. Taste the mixture before adding extra sweetener.
- For a thicker jammy fruit topping, allow the mixture to simmer for a few additional minutes. It will also continue to thicken slightly as it cools.
- Let the peach and blueberry mixture cool completely before adding it to the chia pudding jars.
- Add granola, chopped almonds, walnuts, or pumpkin seeds immediately before serving so they stay crunchy.
- The chia pudding may thicken as it sits. Stir in a splash of milk before serving if you prefer a thinner consistency.
Nutrition Information
This peach and blueberry chia pudding provides a combination of fiber, healthy fats, carbohydrates, and protein. The chia seeds and fruit contribute fiber, while Greek yogurt and milk help increase the protein content.
Storage
Store the chia pudding and peach-blueberry jammy fruit in covered jars or airtight containers in the refrigerator for up to 4 to 5 days.
You can layer the cooled fruit directly into the jars or keep it in a separate container and spoon it over the chia pudding before serving.
Wait until the jammy fruit has cooled completely before covering and refrigerating it. Adding warm fruit to the chia pudding can change the texture and create extra condensation inside the jars.
Stir the chia pudding before serving. If it becomes thicker than you prefer, add a small splash of milk until it reaches your desired consistency.
Keep granola, nuts, seeds, and other crunchy toppings separate and add them just before eating.
Freezing is not recommended because the texture of the chia pudding and softened fruit may change after thawing.
Peach and Blueberry Chia Pudding
Equipment
Ingredients
For the Chia Pudding
- 2 cups milk of choice
- 1/2 cup Greek yogurt plain
- 1/2 cup chia seeds
- 1 teaspoon vanilla extract
For the Peach and Blueberry Jammy Fruit
- 2 medium ripe peaches diced
- 1 cup fresh or frozen blueberries
- 1 tablespoon maple syrup
- 1 tablespoon fresh lemon juice
- 1/4 teaspoon ground cinnamon optional
Optional Toppings
- Chopped almonds or walnuts
- Pumpkin seeds
- Additional fresh peaches or blueberries
Instructions
- Add the milk, Greek yogurt, chia seeds, vanilla extract, and salt to a medium bowl. Whisk until thoroughly combined.
- Let the mixture sit for 5 minutes, then whisk it again to break up any clumps of chia seeds.
- Divide the chia pudding evenly among four jars or meal-prep containers. Cover and refrigerate for at least 4 hours or overnight.
- To make the jammy fruit, add the diced peaches, blueberries, maple syrup, lemon juice, and cinnamon to a small saucepan.
- Cook over medium-low heat for 8 to 10 minutes, stirring occasionally, until the peaches soften and the blueberries begin to burst.
- Gently mash some of the blueberries with the back of a spoon while leaving pieces of peach intact for texture.
- Remove the fruit from the heat and allow it to cool completely. The mixture will continue to thicken as it cools.
- Spoon the cooled peach and blueberry mixture over the chilled chia pudding.
- Add nuts, seeds, or additional fresh fruit immediately before serving.
Notes
- Fresh or frozen blueberries both work well. Frozen blueberries do not need to be thawed first.
- The amount of sweetener needed will depend on the ripeness and sweetness of the fruit.
- Whisking the chia pudding a second time after 5 minutes helps prevent the chia seeds from settling or clumping.
- For a thinner consistency, stir in a splash of milk before serving.
- Allow the jammy fruit to cool completely before adding it to the chia pudding jars.
- Store crunchy toppings separately until serving.
- Refrigerate in covered containers for up to 4 to 5 days.
High-Protein Chicken Caesar Pasta Salad
This high-protein chicken Caesar pasta salad is one of my favorite lunches to prepare ahead for busy workdays. My husband works a traditional nine-to-five and usually takes lunch from home, so having several portions ready makes it easy for him to grab one before leaving in the morning.
I also work from home, and having lunch already prepared keeps me from stopping in the middle of a busy day to figure out what to make. This recipe gives both of us a satisfying lunch that is ready when we need it.
The pasta salad is made with chicken, Protein pasta, chickpeas, Parmesan, romaine, and finely chopped kale. This meal includes protein, fiber, carbohydrates, and vegetables in one container. The kale holds up well during meal prep, while the chickpeas and Protein+ pasta help make the salad even more filling.
You can find the complete step-by-step recipe, ingredient amounts, substitutions, and meal-prep tips in my High–Protein Chicken Caesar Pasta Salad recipe.
Grocery List
- Protein pasta
- Boneless, skinless chicken breasts
- Chickpeas
- Romaine hearts
- Kale
- Parmesan cheese
- Whole-grain croutons
- Plain Greek yogurt
- Fresh lemon
- Extra-virgin olive oil
- Dijon mustard
- Anchovy paste, optional
- Garlic
- Garlic powder
- Italian seasoning
- Salt and black pepper
Serves: 5 generous lunch portions
Why I Love It
- Makes weekday lunches much easier
- High in protein and fiber
- Includes protein, carbohydrates, and vegetables in one meal
- Easy to portion into grab-and-go work lunches
- Greek yogurt makes the Caesar dressing creamy and satisfying
- Chickpeas add fiber and extra staying power
- Kale holds up well during meal prep
- Easy to customize based on what you have available
Customization & Tips
- Cook the pasta only until al dente so it holds its texture during meal prep.
- Allow the pasta and chicken to cool completely before assembling the salad. Warm ingredients can wilt the greens and cause the pasta to absorb too much dressing.
- Protein pasta adds protein and fiber to the base of the salad, but regular rotini, whole-wheat pasta, penne, or bow ties will also work.
- Rotisserie chicken is a helpful shortcut when you do not have time to cook chicken from scratch.
- Finely chopped kale can be mixed directly into the pasta salad because it holds up well in the refrigerator.
- Keep the romaine separate until serving so it stays crisp. Finely shredded green cabbage can also be used for additional crunch.
- Add only enough Caesar dressing to lightly coat the pasta mixture. Reserve the remaining dressing to refresh each portion before eating.
- Store the croutons separately and add them immediately before serving so they do not become soggy.
- Leave out the anchovy paste for a milder dressing. Keep in mind that some Worcestershire sauces also contain anchovies.
- Add cucumber, shredded carrots, bell peppers, cherry tomatoes, or roasted broccoli for additional vegetables. Store watery vegetables separately for the best texture.
For the complete ingredient amounts, step-by-step instructions, substitutions, and food-safety tips, visit my High-Protein Chicken Caesar Pasta Salad recipe.
Southwest Black Bean Quinoa Salad
This Southwest black bean quinoa salad is a colorful, filling recipe that works well for meal-prep lunches, grain bowls, or an easy side dish throughout the week. It combines fluffy quinoa, black beans, corn, fresh vegetables, and herbs with a simple lime dressing.
I love adding a meatless recipe to my Sunday meal prep because it gives us another flexible option that already includes protein, fiber, carbohydrates, and vegetables. I can eat this quinoa salad on its own for lunch, spoon it over greens, use it as a filling for tacos or burritos, or serve it as a side with the sheet pan kafta meatballs.
The salad holds up well in the refrigerator, and the flavors become even better after the quinoa and vegetables have time to absorb the cumin-lime dressing. I wait to add avocado until serving so it stays fresh.
Grocery List
- Quinoa
- Black beans
- Corn
- Red bell pepper
- Cherry tomatoes
- Red onion
- Jalapeño
- Fresh cilantro or parsley
- Limes
- Extra-virgin olive oil
- Ground cumin
- Chili powder
- Garlic powder
- Honey, optional
- Salt
- Black pepper
- Pumpkin seeds, optional
- Avocado for serving, optional
Serves: 6 as a side or 4 as a light main dish
Why I Love It
- Provides plant-based protein and fiber
- Includes colorful vegetables in every serving
- Can be served as a main dish or side
- Delicious cold or at room temperature
- Holds up well during meal prep
- Easy to pack for work or school lunches
- Works in grain bowls, salads, tacos, and burritos
- Naturally meatless and easy to customize
- The lime dressing is fresh, bright, and simple to make
Customization & Tips
- Rinse the quinoa thoroughly in a fine-mesh strainer before cooking to help remove any bitterness.
- Allow the cooked quinoa to cool before combining it with the vegetables. Warm quinoa can soften the fresh vegetables and create excess moisture.
- Drain and rinse the black beans well before adding them to the salad.
- Fresh, frozen, or canned corn can be used. Thaw frozen corn and drain canned corn before adding it.
- Remove the jalapeño seeds for a milder salad or leave some of them in for additional heat.
- Use cilantro for a more traditional Southwest flavor or parsley if you do not enjoy cilantro.
- Add pumpkin seeds just before serving for extra crunch.
- Wait to add avocado until serving so it does not brown during storage.
- For additional protein, serve the quinoa salad with grilled chicken, kafta meatballs, shrimp, or a spoonful of Greek yogurt.Taste the salad after it has chilled and add another squeeze of lime or pinch of salt before serving if needed.
Nutrition Information
This Southwest black bean quinoa salad provides a combination of plant-based protein, fiber, carbohydrates, and vegetables.
The quinoa and black beans contribute protein and fiber, while the corn, tomatoes, bell pepper, onion, and herbs add color, texture, and additional nutrients.
Exact nutrition information will depend on the serving size and whether optional ingredients such as pumpkin seeds, avocado, or additional protein are added. Calculate the final nutrition after confirming the exact ingredient brands and serving size in WP Recipe Maker.
Storage
Store the quinoa salad in an airtight container in the refrigerator for up to 4 days.
The salad can be eaten cold or allowed to sit at room temperature briefly before serving. Stir it well and refresh it with an extra squeeze of lime juice if needed.
Keep avocado and crunchy toppings, such as pumpkin seeds or tortilla strips, separate until serving.
Freezing the fully assembled salad is not recommended because the fresh vegetables may lose their texture after thawing.
Southwest Black Bean Quinoa Salad
Ingredients
For the Quinoa Salad
- 1 cup uncooked quinoa
- 1 3/4 cups water or broth
- 2 cans black beans drained and rinsed
- 1 1/2 cups corn thawed if frozen
- 1 red bell pepper diced
- 1 pint cherry tomatoes halved
- 1/2 small red onion finely diced
- 1 jalapeno finely diced
- 1/2 cup fresh parsley or cilantro chopped
For the Lime Dressing
- Juice of 2 limes
- 3 tablespoons olive oil
- 1 teaspoon ground cumin
- 1/2 teaspoon chili powder
- 1/2 teaspoon garlic powder
- Salt and Black pepper to taste
Instructions
- Place the quinoa in a fine-mesh strainer and rinse it thoroughly under cool running water.
- Add the rinsed quinoa and water or broth to a medium saucepan. Bring the mixture to a boil.
- Reduce the heat to low, cover, and simmer for approximately 15 minutes, or until the liquid has been absorbed.
- Remove the saucepan from the heat and let the quinoa rest, covered, for 5 minutes. Fluff it with a fork, then allow it to cool.
- While the quinoa cools, add the black beans, corn, bell pepper, cherry tomatoes, red onion, jalapeño, and cilantro or parsley to a large bowl.
- To make the dressing, whisk together the lime juice, olive oil, cumin, chili powder, garlic powder, salt, and black pepper.
- Add the cooled quinoa to the bowl with the beans and vegetables.
- Pour the lime dressing over the quinoa salad and toss until everything is evenly combined. Taste and adjust the lime juice, salt, or seasonings as needed.
- Cover and refrigerate until ready to serve. Add pumpkin seeds and avocado as toppings immediately before eating, if desired.
Notes
- Follow the cooking instructions on your quinoa package if its recommended liquid ratio differs.
- Allow the quinoa to cool before assembling the salad.
- Drain the beans and corn thoroughly to prevent excess liquid from collecting in the salad.
- Remove the jalapeño seeds for less heat.
- Add avocado only when serving.
- Refrigerate in an airtight container for up to 4 days.
- Serve cold, at room temperature, or as the base of a Southwest-inspired grain bowl.
Sheet Pan Lebanese Kafta Meatballs with Tomatoes and Onions
These sheet pan Lebanese kafta meatballs are an easy way to prepare one of my favorite Lebanese meals for a busy week. They use the same flavorful combination of ground beef, fresh parsley, onion, and warm spices as traditional kafta, but instead of shaping the mixture onto skewers, I roll it into meatballs and bake everything together on one sheet pan.
I also add sliced tomatoes and onions around the kafta meatballs before baking. I season the vegetables with olive oil, sumac, salt, and black pepper so they become soft, flavorful, and slightly caramelized in the oven. As the tomatoes cook, they release their juices onto the pan, which adds even more flavor to the kafta and gives you something delicious to spoon over the rice.
Growing up, kafta was one of those meals we enjoyed in many different ways. It can be grilled on skewers, cooked in a skillet, baked with potatoes and tomatoes, or tucked into warm pita bread. Shaping the mixture into meatballs makes it especially convenient for meal prep because they are easy to portion for lunches and dinners throughout the week.
This week, I’m serving the sheet pan kafta meatballs, roasted tomatoes, and onions with white rice. You can also drizzle everything with homemade tahini sauce for a creamy, lemony finish.
For the traditional skewered version, visit my Lebanese Kofta Recipe (Easy Authentic Beef Kafta).
Grocery List
For the Kafta Meatballs
- Lean ground beef
- Fresh parsley
- Yellow onion
- Lebanese 7 spice
- Ground cinnamon
- Sumac
- Salt
- Black pepper
For the Sheet Pan
- Tomatoes
- Yellow or red onion
- Olive oil
- Sumac
- Salt
- Black pepper
For Serving
- Cooked white rice
- Tahini sauce, optional
- Pita bread, optional
- Fresh parsley, optional
Serves: 4
Why I Love It
- Easy sheet pan meal with minimal cleanup
- The tomatoes and onions roast in the kafta juices
- Warm Lebanese spices add plenty of flavor
- Easy to portion for meal-prep lunches and dinners
- Delicious served with white rice
- The roasted tomatoes keep the meal from feeling dry
- Can be finished with creamy tahini sauce
- A convenient variation of traditional Lebanese kafta
- Freezer-friendly and family-friendly
Customization & Tips
- Pulse the parsley and onion in a food processor until finely chopped, but avoid processing them into a paste.
- Remove excess liquid from the chopped parsley and onion before adding them to the beef. Too much moisture can make the meatballs difficult to shape.
- Mix the beef, herbs, onion, and seasonings only until combined. Overmixing can make the kafta meatballs dense.
- Use a cookie scoop to portion evenly sized meatballs so they cook at approximately the same rate.
- Lightly wet or oil your hands if the kafta mixture sticks while you are shaping it.
- Cut the tomatoes and onions into similarly sized wedges so they roast evenly.
- Arrange the tomatoes and onions around the kafta meatballs, then drizzle them with olive oil and season with sumac, salt, and black pepper.
- Leave a little space between the meatballs so they roast instead of steaming.
- Spoon the tomato and onion juices from the sheet pan over the white rice when serving. This adds moisture and plenty of flavor.
- For additional browning, broil the meatballs and vegetables for 1 to 2 minutes at the end of cooking. Watch them closely so they do not burn.
- A mixture of ground beef and lamb can be used for a richer flavor.
- Ground chicken or turkey can also be used, but the cooking time and texture will vary. Ground poultry should reach an internal temperature of 165°F.
- Serve the kafta meatballs with white rice and homemade tahini sauce. They are also delicious with pita bread, hummus, or a simple chopped salad.
Nutrition Information
The nutrition information will vary depending on the fat percentage of the ground beef, the amount of olive oil used, and the serving size.
White rice, tahini sauce, pita bread, and any additional sides should be calculated separately. Add the final nutrition information after entering the exact ingredients and amounts into your recipe calculator.
Storage
Allow the kafta meatballs, tomatoes, and onions to cool before transferring them to airtight meal-prep containers.
Store the cooked kafta and roasted vegetables in the refrigerator for up to 3 to 4 days. The white rice can be portioned into the same containers or stored separately.
Keep the tahini sauce in a separate small container and add it after reheating.
Reheat individual portions in the microwave, in a covered skillet over medium-low heat, or in a 350°F oven until warmed through. Spoon any juices from the roasted tomatoes and onions over the rice before serving.
To freeze, store the cooked and cooled kafta meatballs in a freezer-safe container for up to 3 months. For the best texture, prepare fresh tomatoes and onions when you are ready to serve them.
Sheet Pan Lebanese Kafta Meatballs with Tomatoes and Onions
Ingredients
For the Kafta Meatballs
- 1 pound lean ground beef
- 1/3 cup parsley finely chopped
- 1 small yellow onion very finely diced or grated
- 1 teaspoon Lebanese seven spice
- 1/2 teaspoon ground cinnamon
- 1 teaspoon sumac
- 3/4 teaspoon salt
- 1/4 teaspoon black pepper
For the Tomatoes and Onions
For Serving
- Cooked white rice
- Homemade tahini sauce optional
- Chopped fresh parsley optional
- Warm pita bread optional
Instructions
- Preheat the oven to 400°F. Line a large sheet pan with parchment paper or lightly grease it.
- Finely chop the parsley. Dice or grate the small onion as finely as possible.
- If the onion releases a lot of liquid, gently press out the excess moisture using a clean kitchen towel or paper towel.
- Add the ground beef, parsley, finely chopped onion, Lebanese 7 spice, cinnamon, sumac, salt, and black pepper to a large mixing bowl.
- Mix gently with your hands until the ingredients are evenly combined. Avoid over-mixing, which can make the meatballs dense.
- Divide the mixture into approximately 16 evenly sized meatballs and arrange them on the prepared sheet pan.
- Arrange the tomato and onion wedges around the kafta meatballs. Drizzle the tomatoes and onions with olive oil. Sprinkle them with sumac, salt, and black pepper, then toss gently to coat.
- Bake for 18 to 22 minutes, or until the kafta meatballs are browned and reach an internal temperature of 160°F.
- For additional browning, broil the meatballs and vegetables for 1 to 2 minutes, watching them closely.
- Serve the kafta meatballs with white rice and the roasted tomatoes and onions. Spoon the juices from the sheet pan over the rice and drizzle with tahini sauce, if desired.
Notes
- For a quicker preparation method, pulse the parsley and onion together in a food processor until finely chopped. Do not process them into a paste, and press out any excess liquid before mixing them with the ground beef.
- Chop the parsley and onion very finely so they blend evenly into the kafta.
- Press excess liquid from the onion if needed so the meatballs hold their shape.
- Mix the meat only until combined to keep the kafta tender.
- Cut the tomatoes and onions into similarly sized wedges so they roast evenly.
- Cooking time may vary depending on the size of the meatballs.
- Ground beef should reach an internal temperature of 160°F.
- Keep the tahini sauce separate during meal prep and add it after reheating.
- Store the cooked kafta and roasted vegetables in an airtight container in the refrigerator for up to 3 to 4 days.
- For the traditional skewered version, visit my Lebanese Kofta Recipe.
Wash and Prep Fruits and Vegetables for the Week
Meal prep does not always have to mean cooking a complete recipe. One of the simplest ways I make busy weekdays easier is by washing and preparing some of our fruits and vegetables ahead of time.
When produce is already washed, cut, and easy to see in the refrigerator, we are much more likely to serve it with meals or grab it for a quick snack. It also saves time when I am packing lunches, building grain bowls, or trying to get dinner on the table.
This week, I’m preparing a few fruits and vegetables that can be used alongside the chicken Caesar pasta salad, quinoa, and kafta meatballs.
Produce to Prep Ahead
Choose fruits and vegetables based on what your family enjoys and what you plan to serve during the week. Some of my favorites include:
- Berries
- Grapes
- Melon
- Pineapple
- Oranges
- Apples
- Cucumbers
- Bell peppers
- Carrots
- Celery
- Cherry tomatoes
- Broccoli
- Fresh herbs
- Romaine, kale, or cabbage for salads
How I’m Using Them
The prepared fruit can be served with breakfast, added to lunch boxes, or grabbed as an easy snack.
The chopped vegetables can be paired with hummus, served alongside the kafta meatballs and quinoa, added to salads, or used to quickly build a grain bowl.
Having these ingredients ready does not lock us into a specific meal. It simply removes one extra step when everyone is hungry and I need to put something together quickly.
Tips for Keeping Produce Fresh
- Wash fruits and vegetables under cool running water before cutting or serving them.
- Dry produce thoroughly before storing it. Excess moisture can cause berries, greens, and chopped vegetables to spoil more quickly.
- Line produce containers with a clean paper towel to help absorb additional moisture.
- Store berries uncut whenever possible and remove any soft or damaged berries before refrigerating them.
- Keep cut apples or pears from browning by tossing them with a small amount of fresh lemon juice.
- Store washed greens in an airtight container lined with paper towels.
- Keep chopped cucumbers and tomatoes separate from leafy greens because they release water during storage.
- Wait to cut produce such as apples, bananas, and avocados until closer to serving for the best color and texture.
- Store fresh herbs wrapped in a slightly damp paper towel or place the stems in a small jar of water, depending on the herb.
Storage
Most washed and cut vegetables can be stored in airtight containers in the refrigerator for approximately 3 to 5 days.
Prepared fruit varies depending on the type. Berries and cut melon are generally best used within a few days, while whole grapes and citrus fruits may last longer.
Check the produce throughout the week and use any softer items first. Exact storage time will depend on the freshness of the produce when purchased and how it is prepared and stored.
Even spending 10 to 15 minutes washing fruit, chopping vegetables, and organizing the refrigerator can make breakfasts, lunches, snacks, and dinners feel much easier throughout the week.
Final Thoughts
This week’s Sunday meal prep is a good reminder that preparing for the week does not have to mean cooking every single meal in advance.
By making a few versatile recipes, like peach and blueberry chia pudding, high-protein chicken Caesar pasta salad, quinoa, and sheet pan Lebanese kafta meatballs, I have several breakfast, lunch, and dinner options ready to mix and match throughout the week.
Even the smaller tasks, like washing fruit and chopping vegetables, make a difference. Having ingredients ready to grab helps me build balanced meals faster, pack lunches more easily, and spend less time figuring out what everyone is going to eat.
I hope this week’s meal prep gives you a few ideas you can use in your own routine. You do not have to make everything at once. Choose one or two recipes that would make your week easier and start there.
Let me know what you’re meal prepping this week, and be sure to save this post for your next Sunday meal prep!
More Sunday Meal Prep Ideas
Looking for more simple recipes to make your week easier? Here are a few more Sunday Meal Prep menus with high-protein breakfasts, make-ahead lunches, and easy family meals:
- Sunday Meal Prep 7/5/26 featuring mango coconut chia parfaits, high-protein cheeseburger bowls, Mediterranean layered salad jars, and chocolate tofu mousse.
- Sunday Meal Prep 6/21/26 featuring lemon blueberry baked oatmeal, peach Caprese pasta salad, lemon dill tuna salad, and high-protein street corn chicken salad wraps.
- Sunday Meal Prep 6/14/26 featuring high-protein biscuits, broccoli pesto protein pasta salad, Greek chicken and potatoes, and dragon fruit chia pudding.
- Sunday Meal Prep 5/24/26 featuring strawberry cheesecake chia pudding, chicken shawarma rice bowls, Greek yogurt Parmesan egg bites, and Mediterranean dense bean pasta salad.
You can also browse all of my Sunday Meal Prep recipes for even more ideas to mix and match.